1.1 Distributor Home Page
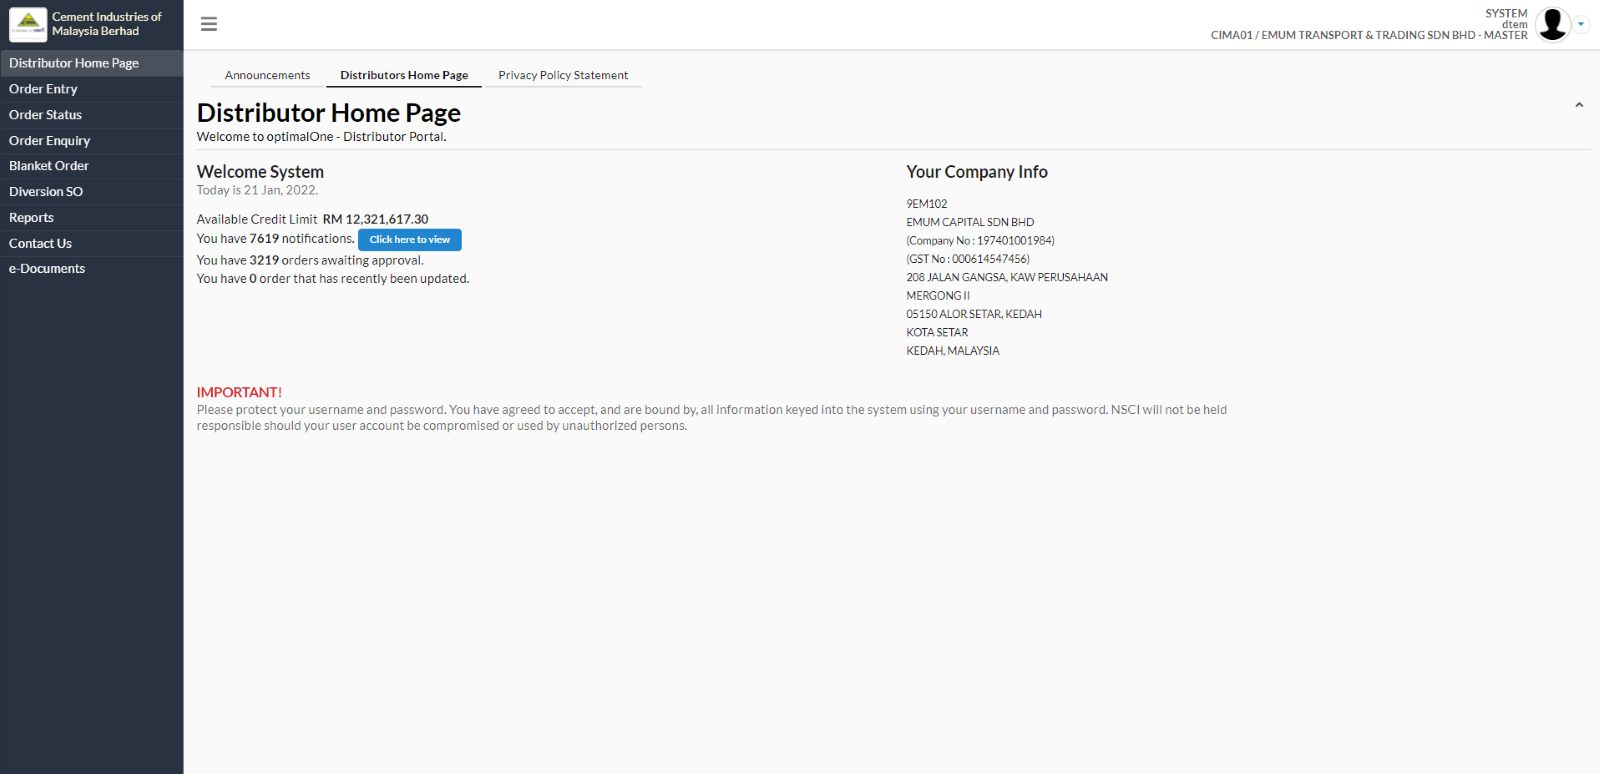
The Distributor Home Page welcomes you to your Distributor Portal, and includes the following:
- Welcome message
- Today's date
- A status summary of orders awaiting approval and recently approved
- A summary of your company information
- Top and left navigation buttons
1.1.1 Home Page - Top Navigation Buttons
Next to the Home Page button, there is an Announcement button.


When you click on the Announcements button, you arrive at a page with CIMA's latest announcements and updates for you. An important page to visit regularly, your CIMA representative will discuss with you the kinds of information posted for you on this page.
1.1.2 Home Page - Left Navigation Button
In the Home Page, the button on the left column take you to areas and functions within the Distributor Portal as described below:

1.2 Order Entry
When you click on the Order Entry button, you arrive at the Order Entry page where you can enter Purchase Orders. This page is where all the information regarding your PO is entered for CIMA's approval.
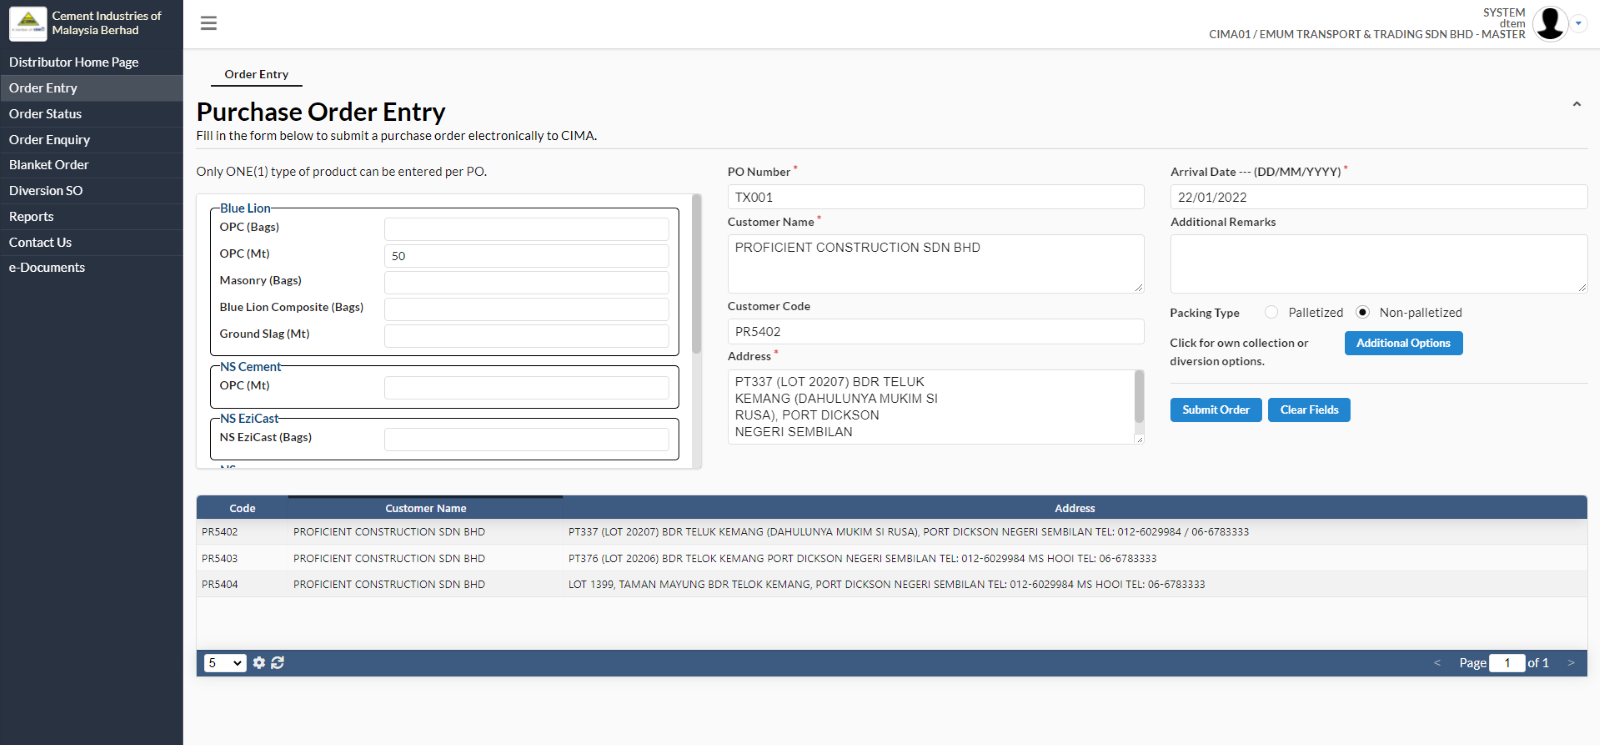
1.2.1 Elements on the Order Entry Page
A brief overview of fields and elements on the Order Entry Page are outlined in the table below for your easy referenced.
(Note: Only one (1) type of product can be entered into an order per PO submitted. If you have a single order with multiple types of products, simply submit a new PO for each kind of product).
Field Name/Button | Description |
OPC Cement (Bags) | Enter the quantity in digits (eg. 500) Ensure you key in the order in the right fields for Blue Lion or NS Cement. If you do not have any preference, then enter your order in the top section, ‘No Preference’
|
OPC Cement (Metric Tonnes) | Enter the quantity in digits (eg. 1500) Ensure you key in the order in the right fields for Blue Lion or NS Cement. If you do not have any preference, then enter your order in the top section, ‘No Preference’
|
Masonry (Bags) | Enter the quantity in digits (eg. 800) For masonry orders, the order is entered in the ‘No Preference’ section.
|
Additional Options Button | This button contains options for orders which are to be self collected, palletized or a diversion delivery. See next section for more information.
|
Delivery date | The delivery date field can either be typed in manually as per convention (DD/MM/YYYY) or the calendar function can be called by clicking on the “Arrival Date” option. When you click, a calendar will pop up, and the desired date can be clicked on for automatic entry. |
Additional Remarks | This is a general field for you to add additional comments for CIMA, on any special requests or any information with regards to the order. The entry of this field is optional.
|
Customer Name Customer Code Address
| These fields are for you to enter in the customer’s full name, customer’s code and contact information. |
“Submit Order” Button | After entering all data and checking for accuracy, Distributors must click on Submit Order button to ‘submit’ the order to CIMA. (This is further explained below in section 3.3.2.)
|
“Clear Fields” Button | The Clear Fields button is used to reset all fields, and clicking on this will empty all fields. When you have accidentally entered a lot of wrong information, or would like to re-enter information altogether, this function will help you to do this quickly.
|
Result Table (customer data search) | The bottom table is a Customer Data Search table that allows for quick reference to an existing record in the database. (Please see Chapter 2 for further explanation).
|
1.2.2 Additional Options Button
Click on the Additional Options button. The 'Additional Options' box will pop-up.
Elements in the Additional Options box are:


1.2.3 Submit Order
Once all the information is completed and checked for accuracy on the Order Entry Page, you must click on the Submit Order button to submit this order to CIMA.

When you have clicked the Submit Order button, a confirmation page will pop up to ask for confirmation of purchase order submission. This will give you a final opportunity to confirm whether details are accurate or not in the purchase you will send to CIMA.

When you view the Confirm Purchase Order Submission and there is incorrect information on the order, click Cancel to go back and edit the information in the PO entry page, and redo the Submit Order process.
If all the information is correct however, click Confirm. When you click Confirm, you will be returned to the PO Entry page and a confirmation message will pop up in the "Purchase Order Submitted" box. The message will say,
“Purchase Order for customer "FULL CUSTOMER NAME APPEARS HERE"
(PO #: 999999) has been submitted.
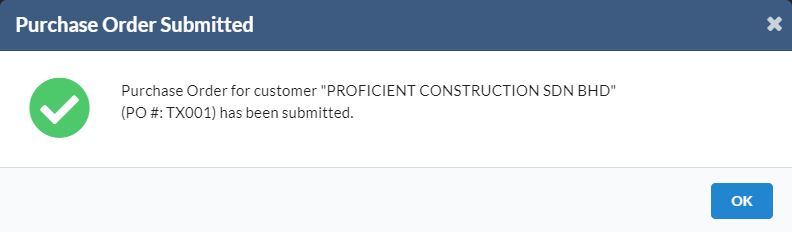
When the confirmation notice appears, the PO submission to CIMA is complete, and you can click OK and proceed to either another PO or conduct other activities available in the Distributor Portal.
1.3 Order Status
The Order Status page helps you increase visibility into the status of your orders by enabling you to check the status of all orders made by you and your colleagues in your company.
When you click on the Order Status button, you will arrive at the Awaiting Approval page in the Order Status page.

1.3.1 Order Status - Top Navigation Button
In the Order Status page, there are four top navigation buttons at the top horizontal navigation bar.

In the top navigation button, each order status page contains corresponding information as follows:
- Awaiting Approval: All orders awaiting approval from CIMA will appear in the Awaiting Approval Page.
- Recently Updated: All orders recently updated by CIMA appear in the Recently Updated page
- Past 2 weeks: All orders submitted through the Distributor Portal to CIMA in the past 2 weeks appear in the Past 2 Weeks page.
- Past 1 Month: All orders submitted through the Distributor POrtal to CIMA in the past 1 Month will appear here.
When you click each page, a table with the corresponding order status information will appear. (Note: For each table, you can choose to resize the table window and column width, and to sort the information by these columns: PO#, Order Submission Date, Customer Name, and Status).
1.3.1.1 Column Fields in the Order Status Tracking List
A brief overview of the column fields available in the Order Status Tracking list in each Order Status view is outlined in the table below for your easy reference.
Field Name | Description |
PO # (Purchase Order Number) | Shows the Order Number |
Order Submission Date | Shows when the order was submitted to CIMA |
Customer Name | Shows the Customer Name |
Status | Shows the current status of the order at any one time |
Product | Shows the type of products ordered |
Quantity | Shows the quantity of the products ordered |
Unit | Shows the units of the order submitted |
1.3.1.2 Type of Status
The following table describes each status which an order may have assigned to it during the process of fulfillment.
Status | Description |
Submitted | Order is submitted to CIMA for processing |
Partially approved | Your orders are first reviewed by CIMA and CIMA may elect to approve some of your orders partially |
Allocated to Depot | The approved quantity by CIMA has been allocated to a particular depot for fulfillment.
If your PO is currently partially approved and the partial order is allocated to a depot, the status will show ‘Allocated to depot’. You should click on the record and view the detailed PO to see status of approvals and allocation. |
Assigned Picking Slip | The allocated PO is processed at the depot level and assigned to a lorry/tanker for delivery. The lorry/tanker is now going through the process of picking up cement and prepare to depart for the customer address. |
Assigned Delivery Order | Once the lorries/tankers have picked up the cement, they are given the delivery orders/notes and they depart for the delivery address. |
Delivered | Upon successful delivery and customer confirmation, the status will be updated to Delivered. |
1.3.2 Detailed View of Purchase Order
When you click on an order in the list, the details of the order will pop up in a "View Details for Purchase Order (PO#: 999999) window as shown below:

Notice there are four tabs altogether in this view. They are:>
- Purchase Order View: Summary of PO details, quantity approved, allocated and order status.
- Purchase Order History: All action that was done on the order are in this tab
- PO: Purchase Order audit trail
- DO: Delivery Order audit trail
- Complaints: Where distributors can submit complaints to CIMA
1.3.2.1 Preview Purchase Order
In the View Details for Purchase Order (PO#: 999999) Window, you can click on the Preview Purchase Order button, and this will pop up another web browser where you can view a printable copy of the PO.

After reviewing the Purchase Order in detail, click OK to return to your chosen Order Status page. At the Order Status page, you can choose to repeat the same process for another order and check other records in the list.
1.3.2.2 Purchase Order History
In the PO History view, users can review all the actions that were taken with regard the order


You can click on each record in the list to view the detailed view the action detail. An example of the 'View Action Detail' is shown below. The action detail is different for every action correspondingly.
1.3.2.3 DO View
The DO tab lists all Delivery Order related information.

The View DO Information contains valuable information on the delivery details of a particular order. Now CIMA's distributors have complete visibility n when lorry/tanker leaves CIMA for customer's place and who are the transporters involved in order fulfillment. In addition to this, distributors also have detailed lorry information including the driver's details which enables distributors to track very closely on this last leg of the fulfillment process.
User can also click on a particular record in the list to view the Action Detail.
1.3.2.4 Complaints
The final tab in the View Order Details window is the Complaints tab.
Here is where distributors can submit any complaints with regards to a particular order.
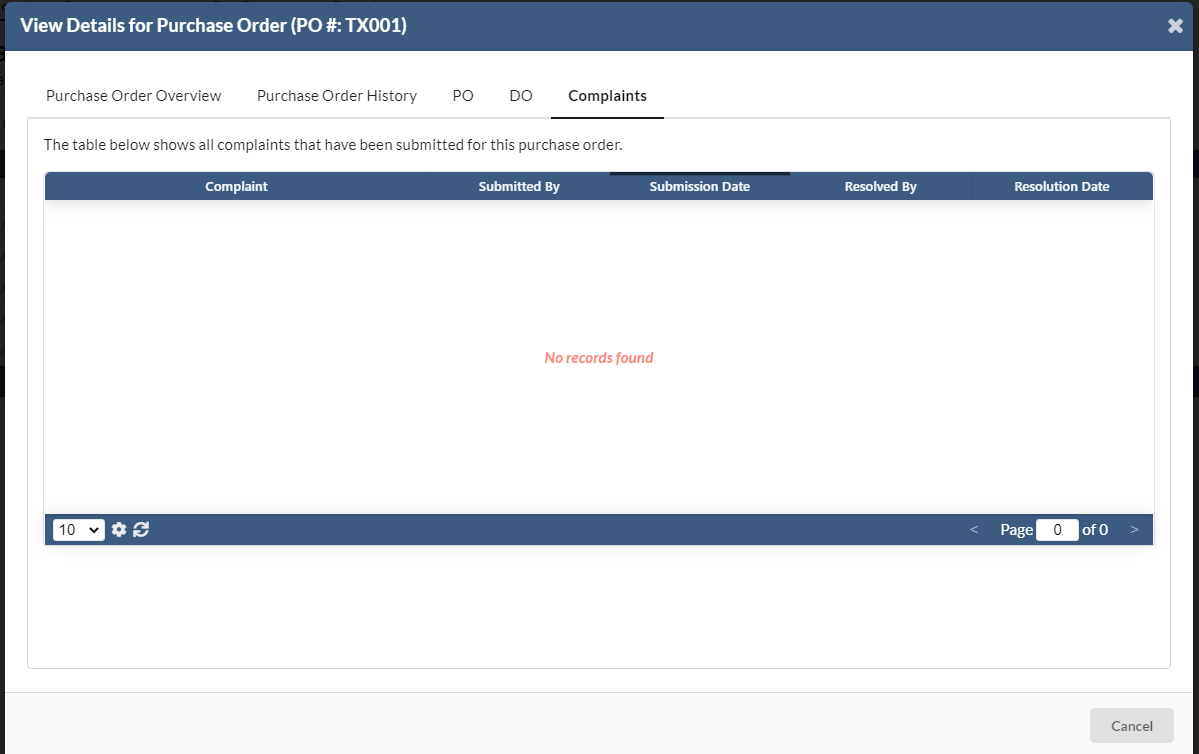

Click on the Submit New Complaints button. The 'Submit New Complaint' window will pop-up. Enter your complaint and choose a category. Use the Other category if the category that best describes your complaint is not found.
Enter your remarks in the Remarks field and click Submit when done.
CIMA will attend to your complaint as soon as possible
1.3 Order Enquiry
The Order Enquiry page helps you to make a quick and easy search on any partocular order submitted. When you click on the Order Enquiry button, you will arrive at the page below that allows you to search for an-order submitted by entering information into any field.
(Note: The Customer Data Search functionality applies to this table, where you can type the first 3 letters in a field, and all related customer information will be displayed in the bottom table with corresponding orders made).

1.4 Blanket Order
In the blanket order, user will be able to see four tabs which are:>
1. Create
- In this tab, user can create blanket order by clicking on the "New Blanket Order Entry" button.
- A new dialog box will appear for the user to add the new blanket order details and once added, user need to click on the "Add" button.
- Once added, user will be able to see the new order create in the list at the "Create" tab. User need to click on the order to submit the blanket order entry.


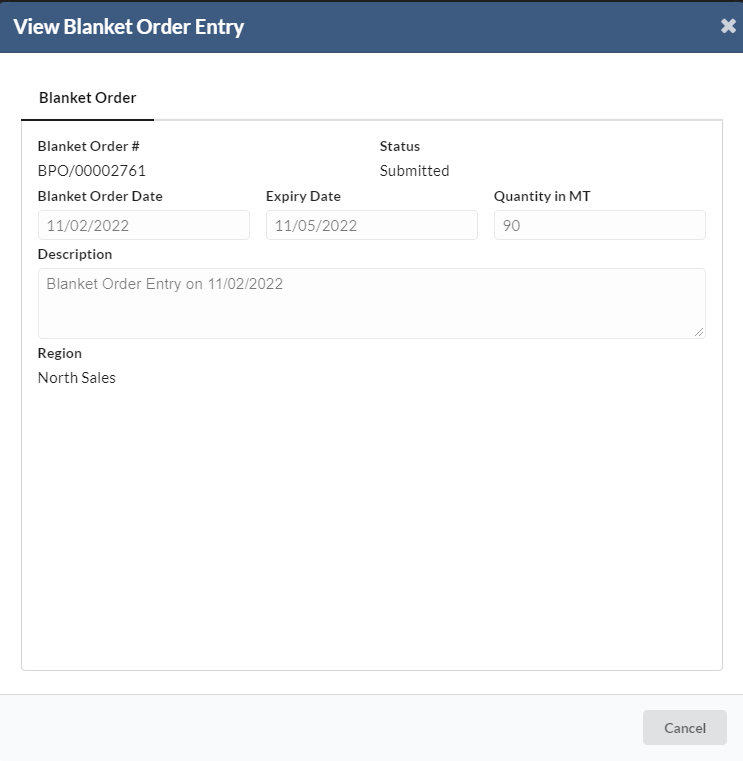
- Upon submitting the blanket order, user will be able to view the blanket order details under the submitted tab now.
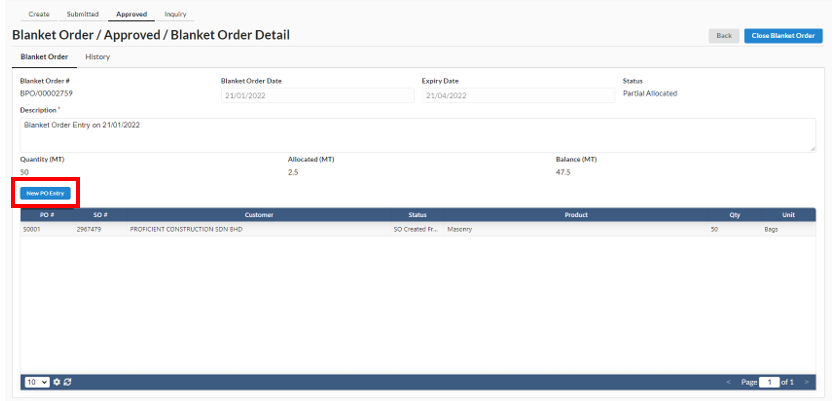
- Upon approval, user can view the approved blanket order details
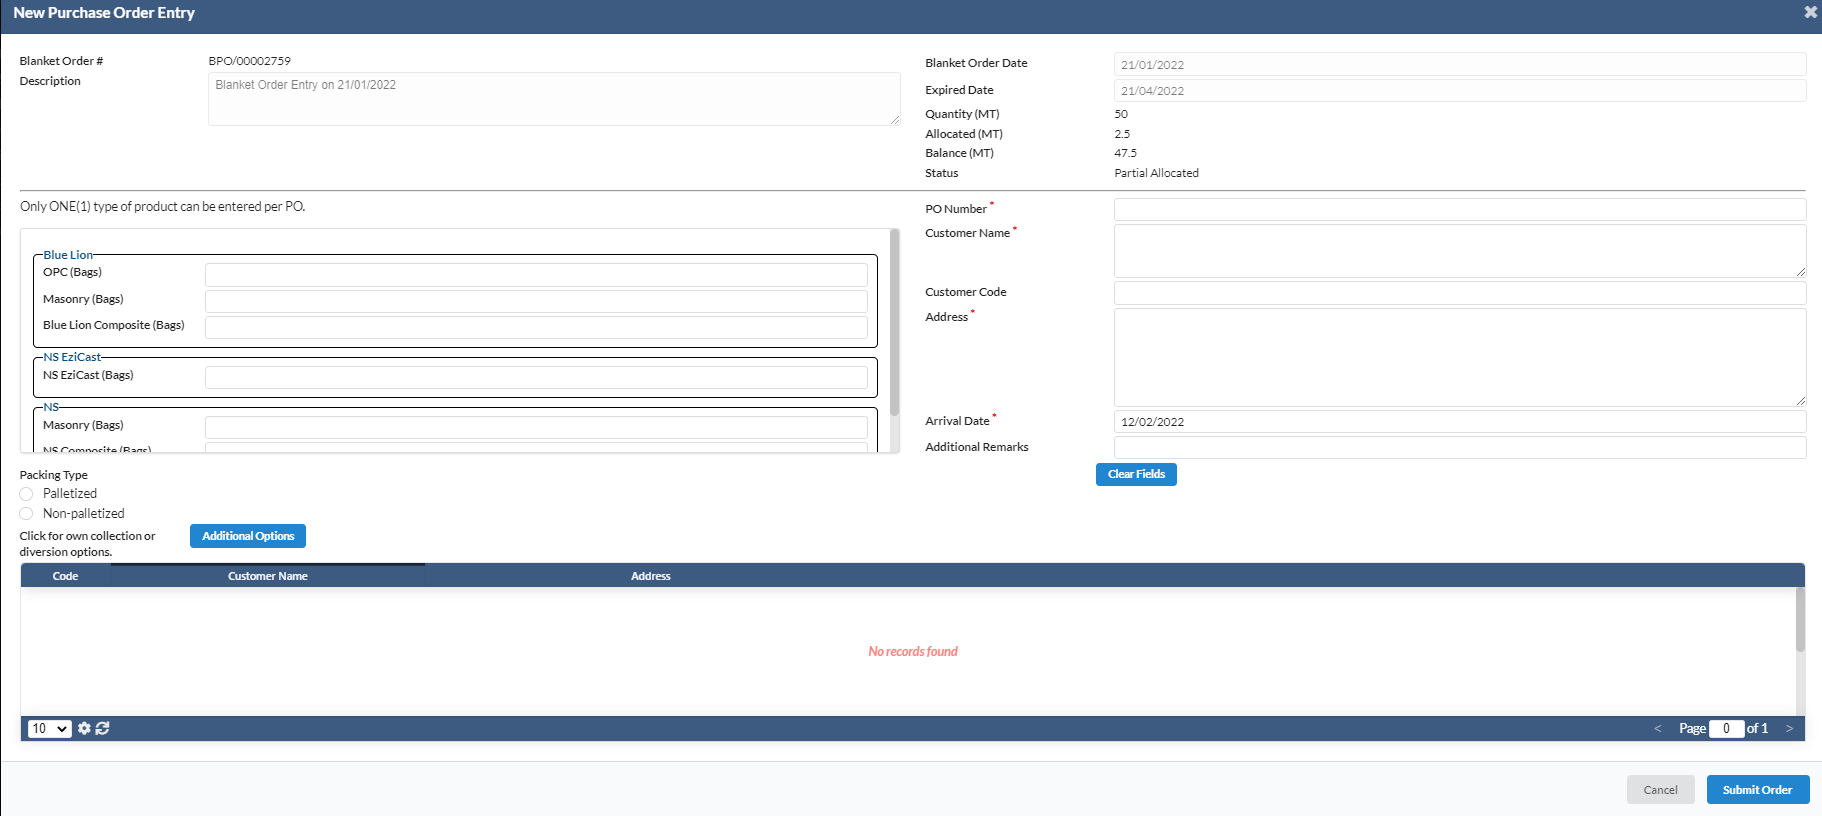
- User can also create a New Purchase Order Entry by clicking on the "New PO Entry".
- A new dialog box will appears where the user can create and submit order.
4. Inquiry

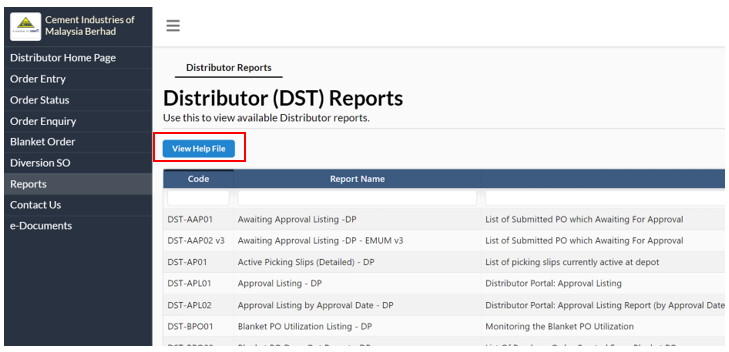
1.5 Reports
The reports are for the user to view available the distributor reports of CIMA. When you click on the View File Help button, you arrive at a new tab where you can refer to the Report Viewer General Guidelines.

example of the report
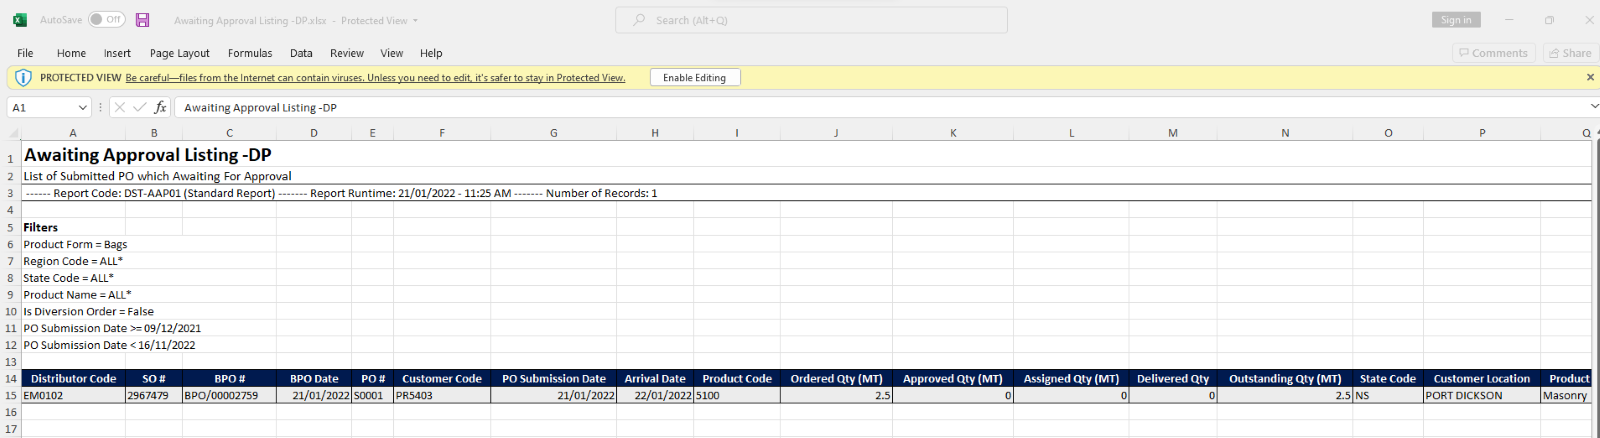
example of the exported report on Excel
1.6 Contact Info
The Contact Info page is a quick reference of CIMA's designated contact people for you. When you click on the Contact Info Button, you arrive at the Contact Info page that will outline the list of CIMA representatives available to assist you with order related items and Distributor Portal related items. If you have any questions or comments, please contact the relevant people here for support.
1.7 e-Document
The e-Document page is for the user to view the invoice, debit note, credit note and Distributor statement. User need to click on the Download button to download the preferred document.
