1. Scheduler
- Upon clicking Log In, the Sales portal will display the home page as shown below.

- There are buttons in the left column to help users perform tasks like Scheduler, central command, CA cost tracking, Listing of Sales Orders which have been submitted, rebates by PO, SO allocation, making enquiries on a particular set of orders, processing of new approvals, credit limit, quota and etc.
- When a distributor login to the portal, the scheduler will appear as shown in the above (the default home page of the Sales Portal). There are few views (top navigation buttons) which are available on the Scheduler page. They are:
- Awaiting Allocation (Orders submitted and waiting to be allocated)
- In the Scheduler view, click on one of the orders under Awaiting Allocation tab.
The dialog box will appear which is shown below:

The tabs available in this view are as follows:
# | Tab Name | Description |
1 | Overview | Displays salient points of order for Sales team’s quick and easy reference. Also contains action boxes to
|
2 | SO | This is the Sales Order tab. Click on this to see specific information related to the Sales Order. Also contains action boxes to Edit Sales Order |
3 | Balance | The Balance tab displays current balances and kick-back quantities. |
4 | Approvals | The Approvals tab displays all approvals for this sales order, including cancelled approvals. |
5 | Customer | Customer information tab. |
6 | Distributor | Distributor information tab |
7 | PO | Displays PO# and area for Sales team to add in remarks |
8 | History | Displays a table which shows all the actions that have been done on this sales order. |
9 | PS | Displays all the detailed picking slip and lorry information. |
9 | DO | Displays a table of all delivery orders that have been created under this sales/purchase order. |
10 | Issues | A facility to capture any issues which may arise for each particular order |
11 | Complaints | A facility to capture any complaints made by customer/distributor |
- Pending Confirmation (List of allocations that are awaiting transporter confirmation)
- Confirmed Order (List of allocations that have been confirmed by transporter)
- Rejected Order (List of allocations rejected by transporter)
- Returned Order (List of allocations returned from depot)
- Search Allocations (Search orders allocated to transporters)
- Transporter Quotas (Manage transporter quotas)
- Transporter Quota Status (View transporter quota status by day)
1.1. Close Order
- In the Overview tab, there is an area labeled “Close Order”. Click on “Close SO” button to close the sales order.

- After that, a new dialog box will appear, click on “OK” to confirm order closure.

2. Confirmed Order
- For Confirmed Order tab, it is to show a list of allocations that have been confirmed by the transporter.

- Click at any intended transporter name from the table.
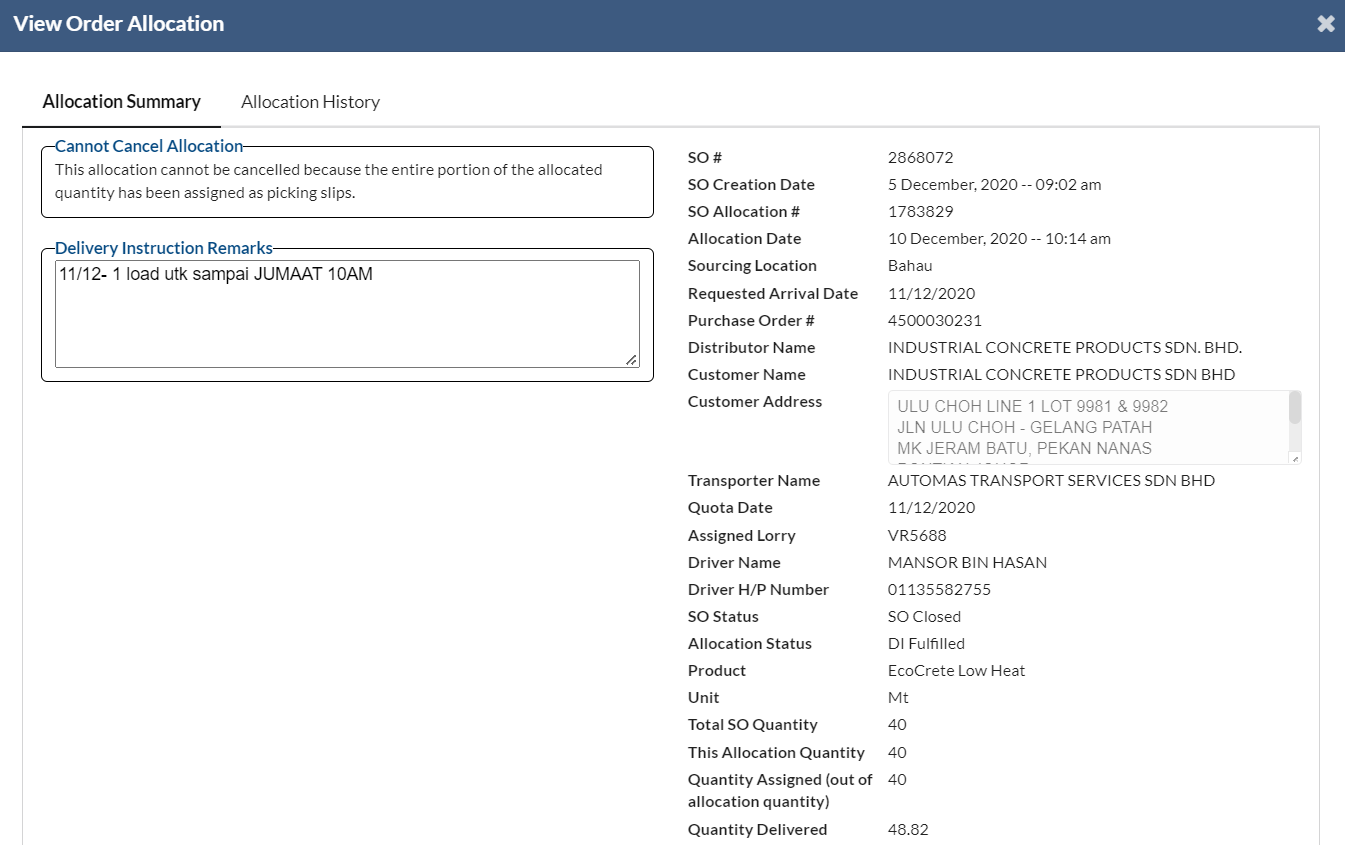
- A new dialog box will appear for user to view the order allocation.
- In "View Order Allocation" dialog box, there will be two navigations which are "Allocation Summary" and "Allocation History".

- Under "Partial Cancellation of Allocation" box, there will be a "Cancel Allocation Portion" button to allow the user cancel the order allocation. The user also needs to fill in the reasons under Remarks box.
- In "Allocation History" tab, the user can view all the action taken by which users.

3. Search Allocations
- In "Search Allocations" tab, there will be a list of orders that have been allocated to the transporters.
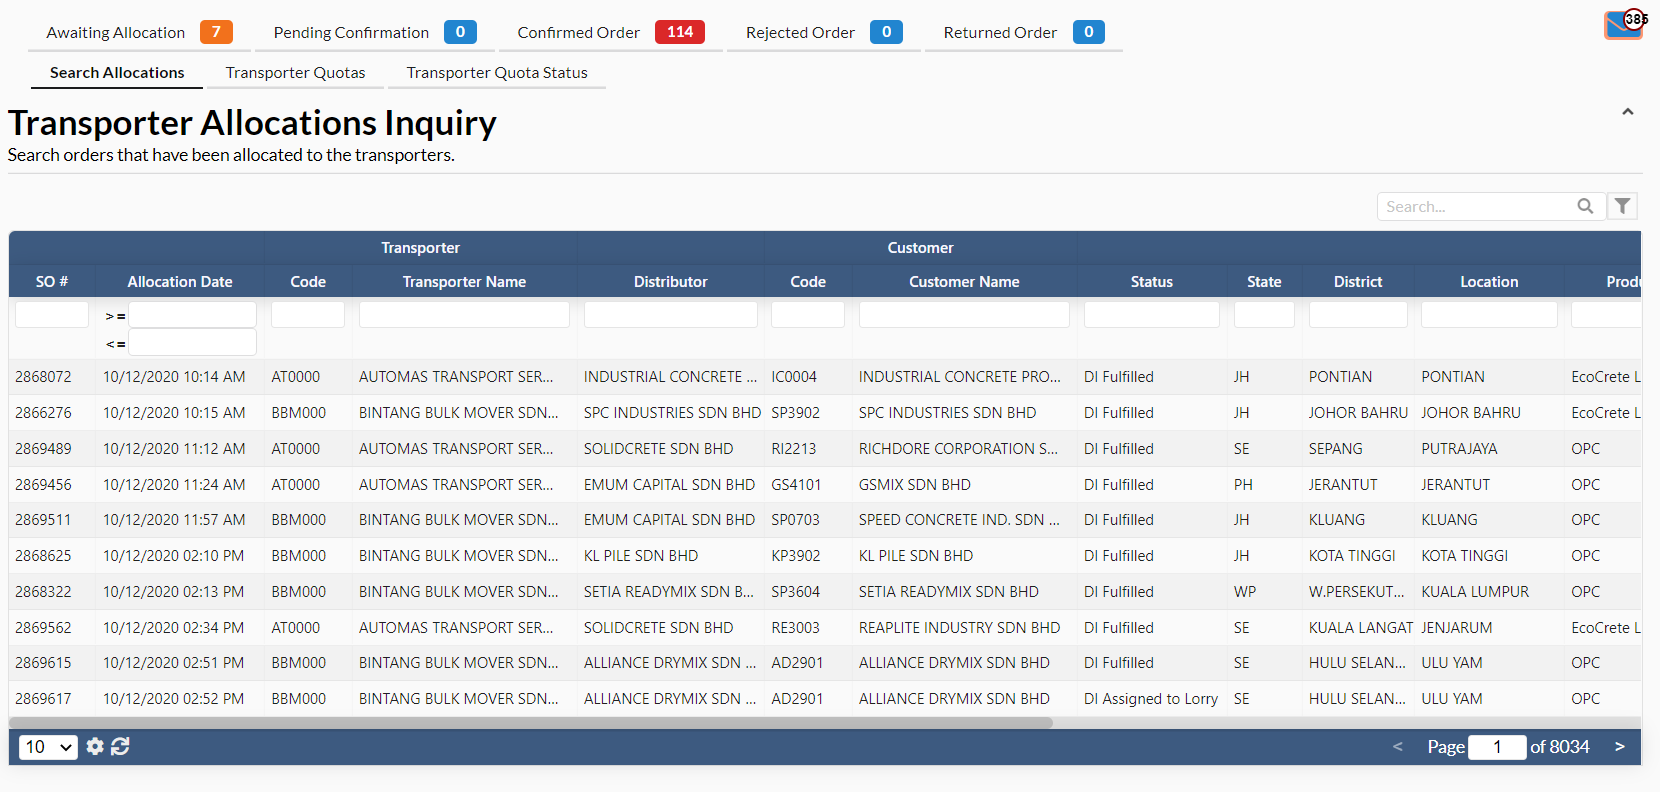
- Click at any intended transporter name.
- A new dialog box will appear for user to view the order allocation details.
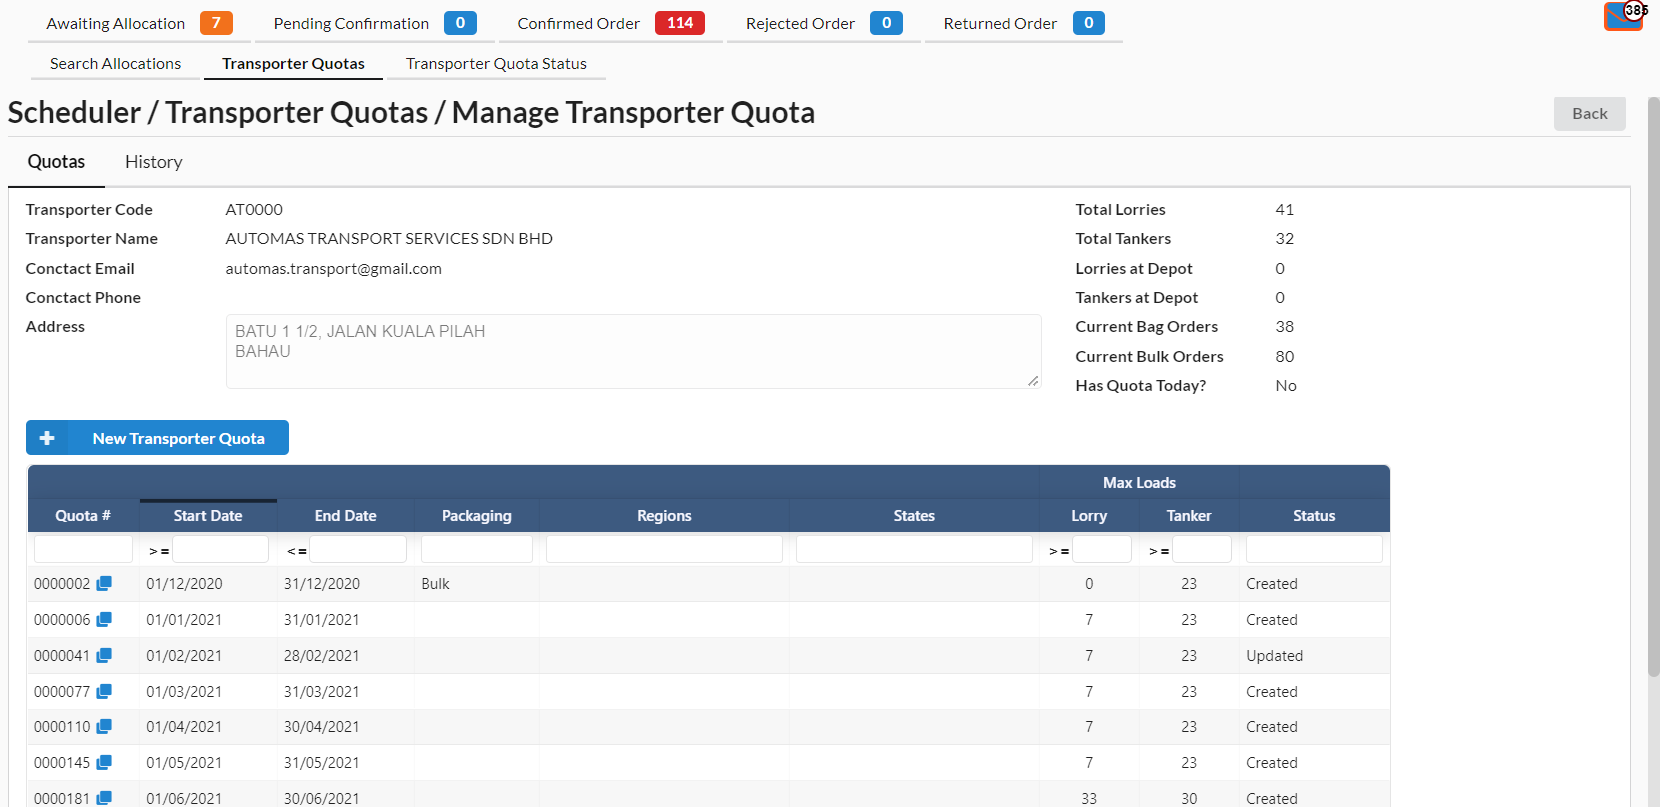
4. Transporter Quotas
- In "Transporter Quotas" tab, it is to manage the transporter quotas.
- Click at any intended transporter name.

- A new page will appear for user to add new transporter quotas.
- Click on "New Transporter Quota" button.
- User can view all the quotas that have been added in the past.
- A new dialog box will appear for user to add a new quota.
- Fill in all the required fields under "Add Transporter Quota" dialog box.
- Click on "Add" to add new transporter quota.

- To view/edit transporter quotas, navigate to Central Command -> Transporter Quotas -> click at any intended transporter name.

- Click at any intended quota.
- A new dialog box will appear for user to edit the quota

- Click on "Update" button to save the changes if there are any changes that have been made.
- User can delete the quota by clicking "Delete this record" button.
5. Transporter Quota Status
- In "Transporter Quota Status" tab, it is to allow user to view the transporter quotas status by day.
- User can choose which date they want to view by clicking on the arrow which is next to "Quota Date"
